How Invisible Waves Have Changed the World
2024-01-25 [Petri]
This is the fourth and last part in my “back to the hardware” story. The very first part can be found here, and the previous part here.
So I moved to Spain and transitioned from Telecoms gizmos to Edge Computing, SaaS systems and Internet-of-Things (IoT), with the aim of feeding cloud-based Data Analytics with data collected from various industrial and commercial systems.
We were developing a SaaS data collection suite that scaled seamlessly from thousands of transactions per day to hundreds of millions, could be deployed in cloud or on premises, and had a promising initial traction with our hotel and airline customers.
But just as we were getting ready to scale up, somebody in China somehow managed to introduce a new, nasty virus to the population.
The era of COVID lockdowns started, and it wreaked serious havoc among our customer base.
We scrambled to adapt and eventually found two “replacement” projects, but they came with an additional hurdle that we initially did not have an answer for: they both needed a compact, economical and relatively low-spec Edge Computing/IoT hardware solution to run our software on.
If you need cheap processing power with 100% standard, cloud-compatible software environment, look no further than the venerable Raspberry Pi series: it has evolved magnificently over the years, and starting from the very first version, I have had these tiny servers sprinkled around, quietly doing their thing, month after month, year after year, consuming just minuscule amounts of electricity.
As you could run one of the leading, standard Linux distros on it, it was ideal for our needs - the cloud side of our solution was geared towards using Ubuntu, and the same Linux version also worked well on Raspberry Pi. So whether you programmed for the cloud or for the edge, you had the same familiar environment at your disposal.
This combination of a widely available HW and a leading Linux distro was also a guarantee of longevity for the platform. Even though the HW keeps on getting updated by new members of the Pi family, reasonable backwards compatibility has been one of the leading features on Pis, and many of the earlier models were still in production.
But for any robust IoT device requirements in a commercial context, Raspberry Pis have some major issues:
First, it is almost impossible to find an enclosure that would be suitable for such a deployment, especially if you need to add some less-common interfacing like the CAN bus: you do have cheap adapters and the necessary driver code, but physically it becomes a horrible, unprofessional rat's nest.
Second, as it runs Linux, there is always some dead time during boot before you can get any meaningful, application specific output to any attached display. This is a drawback, as it introduces "dead time" for the installer to worry about.
Raspberry Pi does have HDMI out, but connecting anything to that on the field is either not robust enough or not cost-effective, and by default, you would only see the kernel boot messages, which are useless from the application point of view.
The standard GPIO bus, however, has SPI and I2C, so you can attach a €3 OLED display to it, but as the boot process still takes about 30-40 seconds before your application kicks in, and the display will remain dead during this time.
Fixing the boot code to display something in a standard, non-embedded Linux without automated regeneration toolchain is a considerable pain to implement and maintain across releases, especially between different generations of the hardware.
But when the Linux env is finally fired up, writing to SPI or I2C is a breeze and very well standardized, so for a minimalist status info and control of the application, such a display with a simple button interface is definitely good enough.
Lastly, the biggest boogeyman is that there is no support against power failures: when the power is cut, you have a small but very real probability of corrupting your file system on the SD memory card, and in our target application case, having the power vanish unexpectedly every day was a "feature".
You could use read-only mode for SD cards and run everything in memory, but on the desired, cheap end of Pis we only had 512 MB of memory to play with. That would leave too little memory for the actual applications, whilst getting a "bigger Pi" would hike up costs and power requirements, without giving really any other benefits in our case.
All these were real issues that had to be solved for our two potential business cases:
#1: we needed a robust enclosure that could take high temperatures and even vibration.
#2: we needed instant display feedback when the system is turned on, so that the installing technician is aware of the state of the device, as well as the ongoing status and control when the system is up and running.
#3: the power would fail daily with 100% predictability, so we also needed an intelligent shutdown logic with enough on-board backup supply of electricity to cover the required 20-30 second period for a safe shutdown.
We found one commercial solution that solved #1 and #3, but as it was based on Pi 4, it had way too much processing power, which, together with the embedded hardware that fixed the power fail problem, hiked its price to a level that was beyond “sell-able” in quantities of several hundred units, as was required in this particular application.
And later on, in the middle of our project, that hardware provider even stopped manufacturing them. We would have been screwed big time if that had been our preferred solution.
Therefore, after not being able to find an off-the-shelf solution, I did some initial proof-of-concept testing with discrete electronics, and devised a solution that took care of all of the above mentioned issues, the control of which was totally in our own hands:
I designed a robust, all-in-one 3D-enclosure and a vibration-damping "sleeve" for installing the node into a standard DIN rack, if necessary.
The enclosure was split into three different parts, all of which, together with the internal PCB and display module, could be put together without a single screw: a complete node could be assembled in roughly 30 seconds.
The co-processor on the PCB managed the power level in the in-built supercapacitor array, only turning on the Pi when the caps were full, as well as commanding the Pi to gracefully shut down after a power failure, while still feeding stable backup power for the Pi from the supercapacitors.
The same co-processor was naturally able to give immediate feedback and status information during the boot process, so there would not be any "dead time" from the installation point of view.
As for the required interaction to set a brand-new installation up, two buttons worked well with a menu-driven UI written for the OLED display, so that any customization during installation could be performed.
Depending on the state of the system, these buttons were controlled either by the co-processor or the Linux environment, with the co-processor always being able to "take over" for cases like manual reset.
Finally, I wrote the firmware in C that glued that all together, and the excellent SW team of Datumize handled the necessary SPI bus co-processor interfacing on the Linux side.
It is amazing how a language developed in 1972 and what I personally learned around the 1980s is still totally relevant for real-life problem solving.
It took a couple of iterations to get everything right, and new ideas for features were added "on demand", but the result was an affordable and robust hardware wrapper around various models of Raspberry Pi that ran the latest 64-bit Ubuntu with all the features your could possibly find in a modern Linux distro.
The last PCB layout modification was caused by the component shortage that occurred due to COVID: I had designed it for the form factor of Raspberry Pi Zero 2W, but those unexpectedly became impossible to buy: there wasn't a single supplier in the whole world with stock. Therefore I had to modify some conflicting component locations on the PCB so that Raspberry Pi 3A+ could be used as an alternative "brain".
From the project's perspective, this solution did an "Extract, Transform, Load"-operation on the cheap, allowing full remote control of the connected legacy devices via the wireless down link, and it had all the flexibility needed for interfacing, being directly able to run our data collection software suite as-is.
Software-wise, it was vanilla Ubuntu with our apps on top, and there was no need to adapt anything to a custom-made embedded Linux that would most likely been the only cost-effective alternative. The co-processor transparently took care of the power management and the "immediate UI" issues.
Hence if your software runs on a standard Pi, it would naturally run in this context as well - just a handful of simple user-space daemons and helper apps were needed for the co-processor interfacing.
As i mentioned, setting up the various bits and pieces of the hardware into a "ready to go" state took about 30 seconds per node, and together with the team we devised a way to bootstrap the nodes semi-automatically to a state that would enable a simple auto-configuration procedure at the installation site.
Therefore the whole setup was not only "assembly-friendly", but also "installation-friendly". We could assemble and set up several nodes in parallel, thanks to a clever initial bootstrapping automation.
In terms of the development tools required to create all this, I was very impressed with the Open Source and Freeware offerings:
For the 3D-design, I naturally kept on using Blender. I hit some weird manifold issues every once in a while after some complex changes, but found on-line tools that could identify and fix those issues, so that Cura would not choke on the generated files.
I’m sure there are more suitable options for 3D-design, but as I explained in the previous blog entry, I knew enough Blender in the 3D-context from the past to get stuff done quickly, and it is a truly a formidable piece of OSS.
For the circuit and PCB design, I found KiCad to be flawless: it never crashed on me during my long days of editing sessions, and its output was directly readable by commercial PCB manufacturers. All versions of the manufactured PCBs were 1:1 to the schematics created with KiCad.
Often you had to expand KiCad's component library, but there are many sites that provide that information, or in a couple of cases, I just generated those manually with the internal component editor.
An autorouter software called Freerouting did the most boring bits of wiring, although you had to sort out thicker power lines and any position and size-critical connections manually first.
Using a separate program for autorouting added a somewhat clumsy additional step of back-and-forth of generated intermediate files, but considering its benefits, it was no big deal.
The autorouter got stuck at times, but in 99% of the cases it was my fault: something in the manually laid-out wiring was too restrictive to get around, so I adjusted it and re-ran the routing.
As for the co-processor, I went back to my early day favorite Microchip and used the now free MPLAB X tools. This setup did crash from time to time, and did not handle the chip programmer interface gracefully at all times, but all in all, did its job, although with occasional frustration thrown in.
Like with a lot of software-hardware glitches, the venerable "turn it off and on again" method worked.
Most importantly, the assembly code that MPLAB produced out from the C sources was flawless, so all functionality gremlins that popped up were courtesy of yours truly.
Still the fact that the manufacturer-provided software environment worked much worse than free ones was a surprise, and for any "encore" versions, I certainly would evaluate my microcontroller and IDE options with more detail.
But in this particular project, time was of the essence, and I knew PICs, so it was the fastest solution.
All in all, I managed to complete this overall hardware/firmware project successfully, thanks to the experience gained over some 25 years in widely varying contexts.
Compared to the earlier similar experiences in my past, what had changed over the years was the quality of the tool set, the easy access to professional PCB manufacturing, as well as the "mass production" of 3D-printed parts, and all of this was sugar-coated by the versatility of the Linux environment, both as the development platform as well as the target.
There are still cases where decades of cross-functional experience is the key to get stuff done.
Personally, I have gone through a full circle from working on super-expensive Unix/Solaris computers and doing hardware designs with discrete components, to today's ultra-cheap and versatile Linux environments and microcontroller-based auxiliary hardware.
In the old days, it was the processors and memories that cost big money. Today, the most expensive components are capacitors and mechanical connectors.
Also, my work experience that started on Unix and is still valid with Linux today must be one of the longest lasting viable career paths in technology. What has changed is the price of the hardware: an identical performance today costs about 5% of what it cost in the 1980s.
When you have to solve real-life problems, there are times when it is good enough to get a freshman out of college to "do stuff". Give the guy or gal a Java or Python IDE and wait for the code to emerge.
Today's software focus is mostly on the cloud, with the flexibility to dial in resources as needed.
Things like memory allocation are handled under the hood, and there's very little shoehorning required: whether your server instance costs $5 or $20 per month to run, it does not really move the cost needle, unless multiplied by thousands. So you usually only optimize the resource usage when you really have to.
And then there are still some cases in which you benefit from decades of versatile experience that covers all aspects of a functional product, like:
- Understanding component selection and dimensioning, and being able to solder them up into a functional circuit on a prototype board.
- Debugging real-time issues with an oscilloscope.
- Creating low-level firmware for restricted hardware environments.
- Optimizing your code so that the processor bandwidth is capable of handing multiple parallel interrupt sources.
- Adding various wireless and data bus features that are tailored to the application at hand.
- Devise the code that glues Linux environment and your co-processor together.
- Design an easy-to-assemble mechanics around your electronics.
- And finally juggling 10+ subcontractors to get it all together as a tangible, easy-to-use physical product, on time and on budget.
It is always a thrill to see your initial, abstract plan to come into fruition as a functional device.
As I wrote in the first part of this story, I have loved working with electronics since the age of 12.
I still do.
Permalink: https://bhoew.com/blog/en/151
Show latest Earlier entries

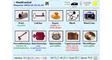
Raspberry Pis are great, but need some help in commercial context
You can purchase A Brief History of Everything Wireless: How Invisible Waves Have Changed the World from Springer or from Amazon US, CA, UK, BR, DE, ES, FR, IT, AU, IN, JP. For a more complete list of verified on-line bookstores by country, please click here.
Earlier entries:
You can purchase A Brief History of Everything Wireless: How Invisible Waves Have Changed the World from Springer or from Amazon US, CA, UK, BR, DE, ES, FR, IT, AU, IN, JP. For a more complete list of verified on-line bookstores by country, please click here.
PRIVACY STATEMENT AND CONTACT INFORMATION: we don't collect anything about your visits to this website: we think that your online history belongs to you alone. However, our blog comment section is managed by Disqus. Please read their privacy statement via this link. To contact the author directly, please costruct an email address from his first name and the name of this website. All product names, logos and brands are property of their respective owners and are used on this website for identification purposes only. © 2018 Petri Launiainen.